How to Create an Event Poster. Swift Publisher for Mac Tutorial
This article will guide you through each and every step of creating a poster for the ZooPark in A4 format with the help of our poster maker software.
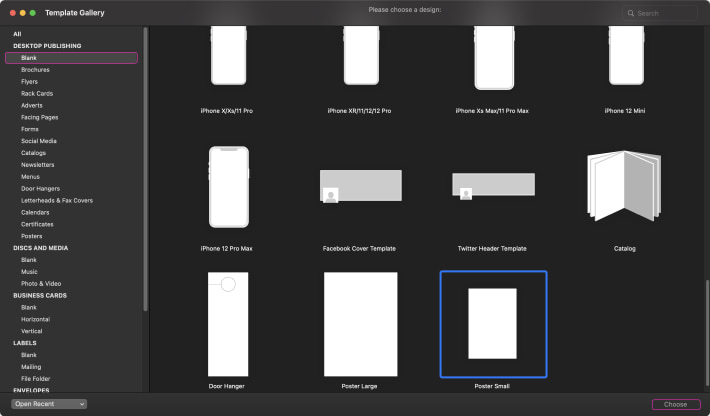
Open Swift Publisher, select Poster Small in the “DESKTOP PUBLISHING” category, and press the Choose button on the bottom right side of the interface.
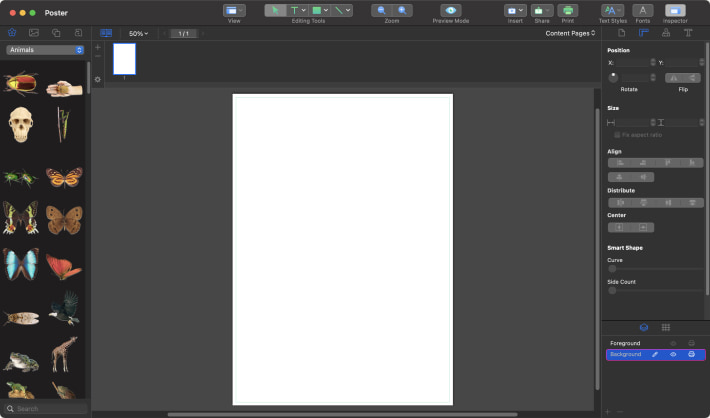
On the bottom right side of the Inspector, select the Background layer. If you want, you can rename this layer by double clicking on it.
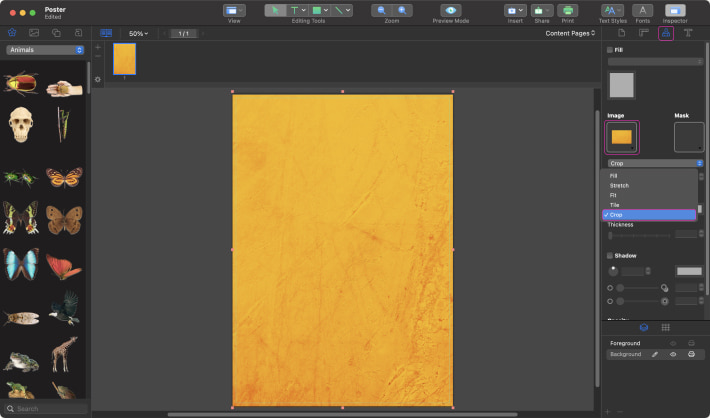
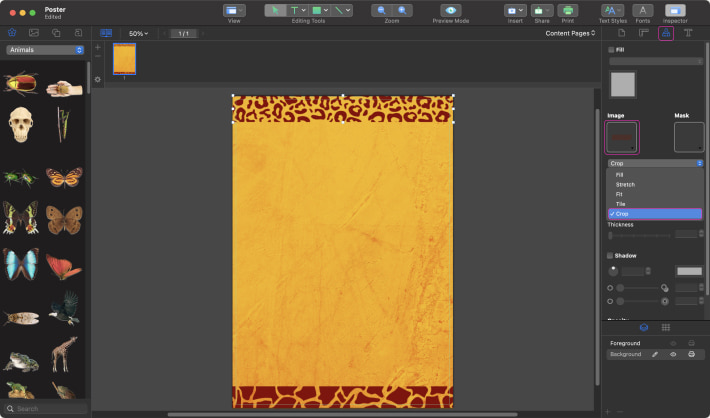
Let’s import your background images. There are two ways to do that. The easiest way is to drag and drop the image directly onto the canvas. Another way is to use the Insert > Image > From File menu.
Note that your image should have a resolution of at least 300 dpi. After inserting the image, let’s crop it by the artboard. In the Inspector, go to Appearance, choose Crop in the dropdown panel, and crop your image as shown on the screenshot.
Let’s add two more decorative images to make the background more attractive. Use the same methods as described in the previous step and crop the same way as shown on the screenshot.
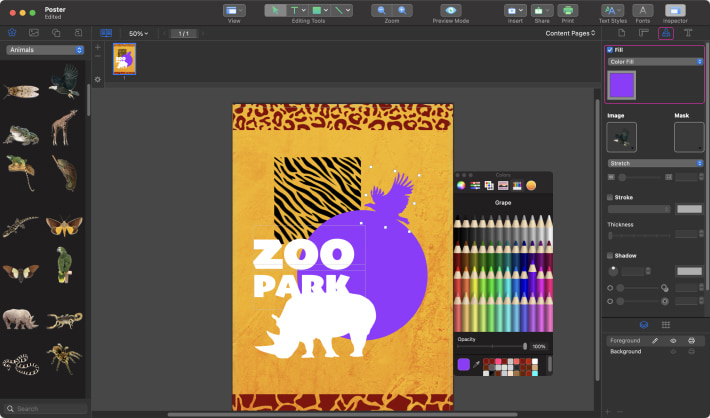
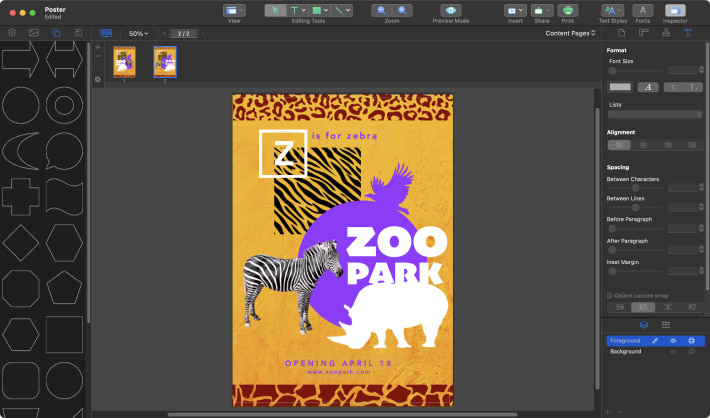
On the bottom right side of the Inspector, select the Foreground layer. Go to the Source Panel on the left side of the interface, select the Smart Shapes icon, and choose the Rectangle and the Circle.
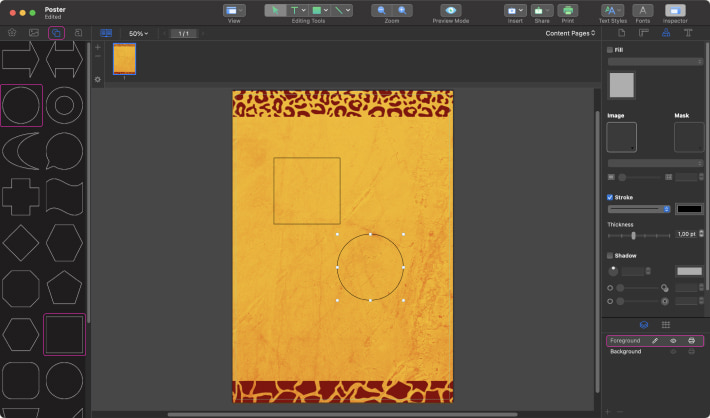
Resize the circle by selecting it and dragging one of the handles on its border the same as shown on the screenshot. In the Inspector, go to Appearance and check the Fill checkbox. Press the color button on the Inspector. In the pop-up window, choose the crayon tab and select the grape crayon.

Once you’re done with the circle, resize the square by selecting it and dragging one of the handles on its border, and place it the same way as shown in the screenshot.
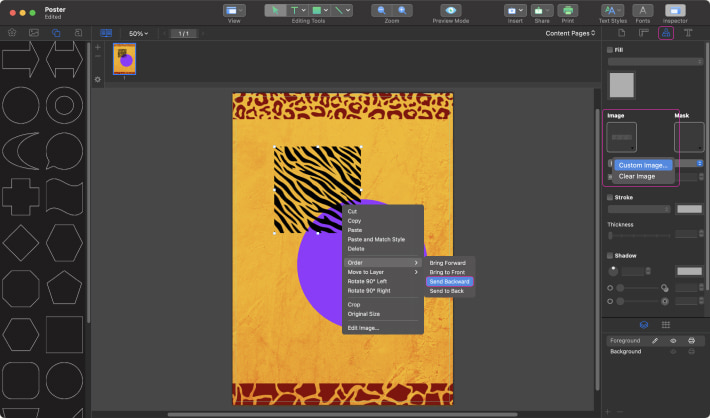
Let’s insert an image inside the square. In the Inspector, select the Image, choose Custom Image in the dropdown menu, and insert the picture from your computer. Right click on the shape and select from the context menu Order > Send Backward.
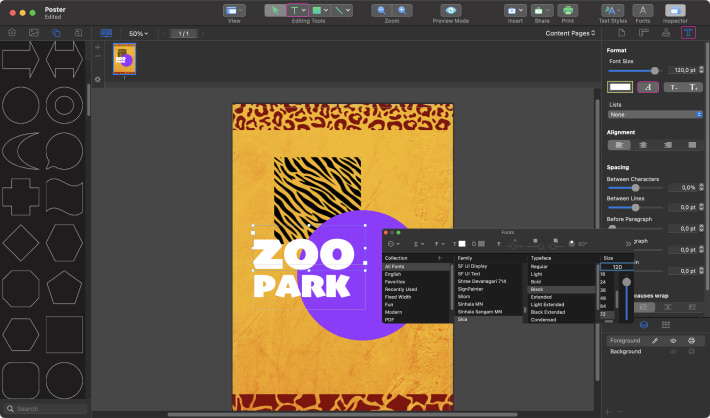
To add the Poster title, click the Text icon on the Toolbar. On the canvas, click and drag to create a text box. Then go to Inspector > Text and press the “A” button. Set the font to Skia Black with the size 120 pt for ZOO, and Skia Black with the size 90 pt for PARK.
To choose the color of the text, press the color button (location is marked with an yellow outline rectangle on the screenshot), and select the white color.
It’s time to add animals to our ZooPark Poster. Go to the Source Panel on the left side of the interface and select the Clipart Collection icon. Choose the clipart with rhino and eagle in the chapter Animals.
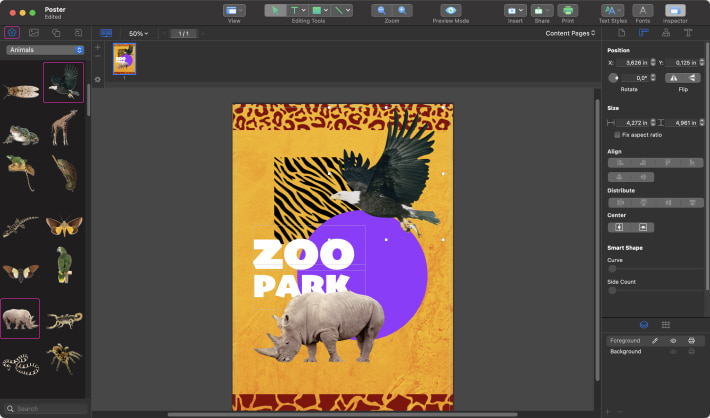
To apply color to the animals, perform the same steps as described in Step 6. Resize holding the Option key, and place them the same way as shown on the screenshot.
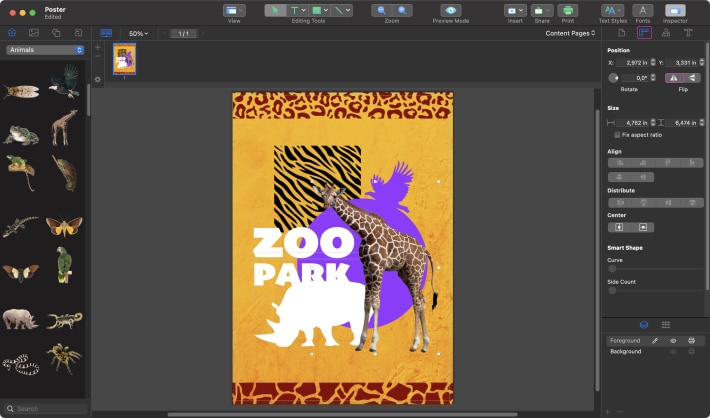
Choose the giraffe from the clipart library, and flip him horizontally using the flip button in the Inspector > Geometry.
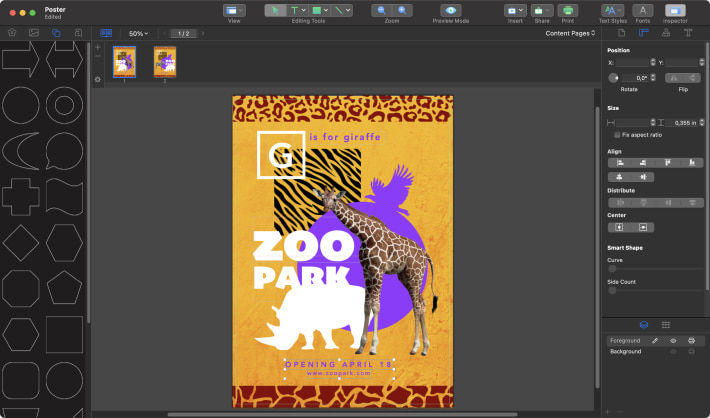
Let’s add some text to our Zoo Park poster. Using the same method described in Step 8, choose the following parameters for the text:
- “G”—font Avenir Heavy 92 pt, white color;
- “is for giraffe”—font Avenir Heavy 25 pt, grape color.
Once you’re done with the text, create the Square as described in Step 5. Place it so as to create a frame for the letter “G”. Go to Inspector > Appearance, and set the white color stroke with an 8 pt thickness.

It’s very important to add contact info and the opening date. Using the Avenir Bold font for the text, choose size 20 pt for the date and 16 pt for the website. You can align text to each other. Holding the Shift key, select both labels and choose vertical alignment in the Inspector > Geometry.
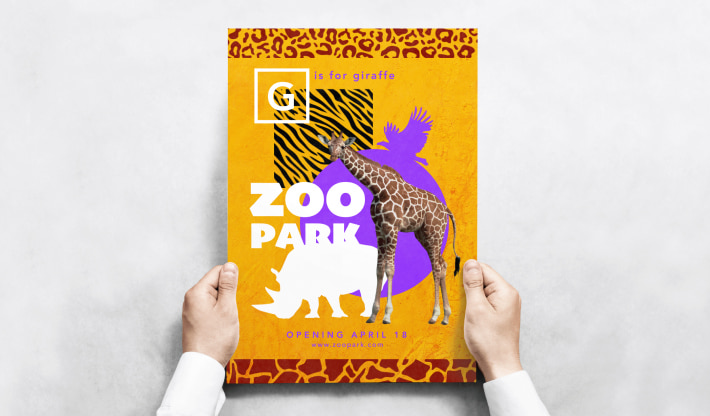
Great job! Our Zoo Park poster is ready! You can finish at this step or you go ahead and create a series of posters in the same style.
Click the right button on the panel menu, and select Add Page in the context menu.

Using the methods described in the article, experiment with pictures, colors and text to get a new poster in the same style with the previous one.
Completed Project
